How To Fall
Winter is fast approaching, and with it comes wet slippery leaves and puddle soaked floors. Unless you are out practicing your Parkour, you probably have only tried to be more careful in potentially treacherous conditions.
As I’ve gotten older, I notice that most people seem to have an increased fear of falling. I am personally over it, as I get tripped up by what I will dub “carpet sharks” that jump up and grab my ankles on low pile carpet with a perfectly flat surface. UGH! Further, I get tackled hard in soccer games and go down. Finally, I have been known to trip on a tree root on a trail run in the mud and superman it down the path.
Big deal. It happens!
Practice that fall!
However, have you ever considered the benefits of actually practicing falling down, in case you hit a hidden banana peel or loose gravel?
If you don’t get attacked by carpet sharks, or tackled in soccer games, or go on trail runs, you might consider practicing falling down. Just like any sport, the more you practice, the easier and less fearful you are about hitting the ground.
One day, I happened to see my friend Lori Jorgenson teaching her group of seniors (dubbed the Forever Young crew at Club Sport Oregon) how to fall in the rock gym on a nice big padded crash pads. It looked like fun, so I stopped to watch.
What were the tips she conveyed to her group?
Watch the video here of the group lined up and throwing themselves down…on purpose! (Lori is to the left of center in a red shirt).
Practice tips
The highlights of falling and things to practice are as follows:
- Turn your head to the side.
- Breathe OUT as you go down.
- Have your palms straight down or make fists with elbows bent to ninety degrees.
- Relax as you fall like a cat.
- Practice falling from a kneeling position, and then plan on using your knees to break your fall. Utilize the powerful tool of visualizing the perfect fall and landing as light as a feather. If you don’t have a big crash pad try a couch or mattress!
Let me know in the comments below if it has:
- ever occurred to you to practice falling or
- if you have and how it went, or if it came in handy.
Keep moving
I once played soccer with a girl who had done gymnastics all of her life, and then taken up soccer later on. She was tackled hard, but as she fell her gymnastics training took over, and she instantly tucked into a somersault and popped right up again, completely unharmed and unruffled. It was remarkable, and speaks again to the concept of practicing that tumble. It takes away the fear!
How to help Fibromyalgia
What exactly is fibromyalgia?
I turned to Webmd.com for a little synopsis…
“Fibromyalgia is the most common musculoskeletal condition after osteoarthritis. Still, it is often misdiagnosed and misunderstood. Its characteristics include widespread muscle and joint pain and fatigue, as well as other symptoms. Fibromyalgia can lead to depression and social isolation. With fibromyalgia syndrome, the following symptoms commonly occur together:
- Anxiety or depression
- Decreased pain threshold or tender points
- Incapacitating fatigue
- Widespread pain
More than 12 million Americans have fibromyalgia. Most of them are women between ages 25 and 60. Women are 10 times more likely to get this disease than men.”
(Interesting, huh! Ten times more likely???)

Fibromyalgia causes you to ache all over. You may have symptoms of crippling fatigue — even on arising. Specific tender points on the body may be painful to touch. You may experience disturbances in deep-level or restful sleep, and mood disturbances or depression.
Your muscles may feel like they have been overworked or pulled. They’ll feel that way even without exercise or another cause. Sometimes, your muscles twitch, burn, or have deep stabbing pain.
Some patients with fibromyalgia have pain and achiness around the joints in the neck, shoulder, back, and hips. This makes it difficult for them to sleep or exercise.”
So, what do you do about it?
My client Barb decided to go to the Mayo Clinic in Arizona for an entire week of testing. Surely one of the most preeminent medical research facilities could offer her a solution for her fibromyalgia. She took a week off of work, paid for her airfare, her hotel, and (this was a few years ago), the out of pocket cost was $7000.
The conclusion?
They handed her an eighty page booklet on how to handle her symptoms. What, pray tell, did the magical booklet say? She let me read it. Drumroll, please…
Exercise every day and work on sleeping better.

Mind blowing advice!
She was shocked, and dismayed. That was a heck of a lot of time, effort, and money spent on the pursuit of an answer.
This is a perfect example of how muscles aren’t going to show up on many (if any) diagnostic tests, and therefore some medical professionals are at a loss as how to treat them.
I just always assume muscles are the culprit, and go from there. Share on XSidebar
About ten years ago, I had an MRI on my knee because I had been the victim of a vicious slide tackle playing soccer. I could run forward, and sideways, but don’t ask me to open the front door because the twisting dropped me. In a nutshell: my MRI came back inconclusive. I looked at my orthopedist and said, “Of course it was inconclusive! My knee doesn’t hurt lying down and braced on the sides (the position I was in when the MRI was taken)…you need to put me in a loaded standing up MRI and then twist the knee. Then we will see what is compromised!” His response surprised me. He said, “Laura, do you know how many tests we would need to do to establish a baseline? Thousands!” I looked at him and said, “Well, then get started!” He laughed. However, it wasn’t funny to me. My knee hurt. However, no one could tell me exactly why.
I totally understood Barb’s frustration.

I read a study once where apparently healthy subjects were woken up repeatedly during the night. They developed fibromyalgia- like symptoms almost immediately.
Good sleep is a big deal!
However, if you hurt all over, how then do you go about exercising? We know the exercise will generally help you sleep better, so getting moving seems to be key.
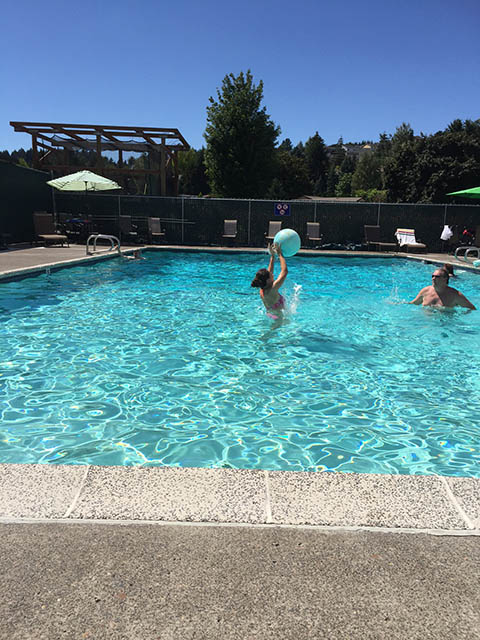
This is a complicated question, but her solution was to start in the water. She regularly takes the water aerobics class. I call them the “Happy Bobbers”, because every time I look out at the pool, they are smiling and bobbing up and down in the water.
Heat seems to help.
Hot tub, sauna, hot packs, icy hot salve, hot rock massage, hot showers…anything to get circulation going in those “cement mixer” muscles. Additionally, we have vibration technology at our fingertips at Club Sport -a Powerplate. One of it’s many features includes increased localized blood flow by thirty percent.

Rolling seems to help.
Get that roller (or tennis balls, or rolling pin, or lacrosse ball, etc) out and start eliminating the tightness. I blogged about the lazy way to flexibility a couple weeks ago… Anything you can do to release some of the muscular tension.

Therefore, if you hurt and your diagnostics (CT, MRI, xray) aren’t helping figure out what the problem is, I would take a good hard look at what your muscles are up to.
Believe in the magic- the magic of muscles!
Let me know what magical solutions you’ve used to get moving when you hurt so much you just didn’t want to in the comments below. I am super curious, and your suggestion might help others! Thank you!
How to run faster
It is common wisdom to overload a muscle to get it stronger. How then do you safely and functionally overload running? A popular way is to use stretchy or resistance bands. If you do an internet search for resistance running bands with some sort of attachment point ( aka harnesses), you find things for sale that are pictured below: Harnesses, with sleds or parachutes attached, or a partner slowing you down, or you are resisting a fixed surface like a wall or pole.
What most all of these harnesses have in common is that they don’t actually target or tax the hip flexor muscles specifically. Instead, they attach at the waist, shoulders, ankles, or even elbows to slow the whole person down. Certainly there is some value in that, but then you have to concentrate like mad to make sure you’re using your hip flexors.

However, one caught my eye. See if you can find it in this collage.

Here it is! Notice it has a waist strap, but the legs also have separate bands across the middle of the quads. That means that when the knee is raised, the band slows the knee down, and provides as much resistance as the runner can generate while running.
Ah, now we are getting somewhere!

Here is another version:

I wanted to find out what you might pay for such a device, and the $66.95 isn’t bad until you find out the manufacturer really considers it an accessory to use in conjunction with their $3000ish machine.

Could you use it without the $3000ish machine? Well, sure, but how about we try a simpler version.
Here is a video of Annika slipping a thick stretchy band around her knees and me slowing her down. She finds it much harder to run than she anticipated, and the audio is horrible, but at the end I ask her if she could run if she wanted to.
“No!” she says, laughing.
We used a simple 1.75 inch superband for a lower cost of $27.95 like the one on the performbetter.com website
Just be sure to stay low as the partner holding the band and providing the resistance so you don’t give your runner a wedgie!
Let me know in the comments below how these ideas are impacting your running!
Six tips to fix a finger that won’t bend
Have you ever had a finger that wouldn’t bend or grip properly? Has it gotten worse over time? Think you might have the beginning stages of arthritis? Read on!
My client Bill was ready to have surgery to fix his finger that wouldn’t grip his golf club. It was messing up his swing and he was getting frustrated. I suggested he try a hand clinic first to see if there were any non-surgical solutions. He took me up on my suggestion, and then I invited myself along on one of his appointments to see exactly what they were doing to help….because it was getting better!
Here are the main treatments they subjected his finger to:
1 – Ultrasound
to warm up the individual joints of the finger.

If you don’t have an ultrasound machine handy, that’s okay. Try some of the other techniques below.
2. – A machine called Fluido
Here he is inserting his hands into a super interesting machine called a “Fluido”.

The Fluido uses heated air circulating -believe it or not-ground corn husk. It was created by an engineer whose daughter broke her arm. He wanted a way for her to rehab her arm in a warm dry heat environment. And when I tried to find more about this machine, it was no wonder when I found that the medication assisted treatment near me also used the same method.
The engineer started with warm air blowing glass beads around, but those hurt! By process of elimination he discovered corn was the least allergic and it has the added benefit of holding heat without moisture. This creates convection heat rather than using something like paraffin or rice which create moist heat. Moist heat and inflammation are often not a good mix, according to Bill’s Occupational Therapist or OT. Therefore, if you are struggling with inflammation consider your heat source. On the other hand, try adding heat to your digits if you want to increase your range as you work on movement.
His job was to do his finger exercises in the Fluido in a ten minute timeframe.

Here is an example of the exercises he did while in the Fluido. They were posted on the wall for reference.


Very fancy and complicated? No, really just taking the fingers and hand through its full range of motion. Easily done at home!
3 – Massage Therapy
Here is his OT using massage to loosen up the forearms. Turns out hands have lots of tendons that originate from muscles in the forearm. Finger tightness? Look up the chain and dig into the forearms!

4 – Ligament massage
Here was the painful part: the small circular massage of the ligaments on the sides of each of the knuckles. She started with her fingers, but moved on to the rubber tipped dowel with lotion. I should have taken a photo of his facial expression. It was contorted most of the time.

5 – Put a brace on it
Bill wears a small handmade brace to straighten his fingers at night because the OT told him time and gentle pressure will change the collagen to straighten the finger out. This is good news….and you can fashion popsicle sticks to create your own.
6 – Pull your finger!
The final tip, which might elicit a giggle or reminds you of something your grandfather might have asked you to do:
Pull your finger!
One pop is good. If there isn’t swelling or pain, you aren’t causing tissue damage.
There are your top six tips to help your not-so-bendy or arthritic digits. Try these on fingers or toes- both could probably use some love. Let me know how you liked the strategies in the comments below, and happy gripping to you!
Top 8 Exercises for your shoulders and Abs
Lately a bunch of clients have needed big time shoulder help. What do I show them? Lots of different shoulder blade exercises on the roller to get the muscles around the blades to stabilize and cooperate. I always like to alternate hip or core exercises with upper body stuff, so here are my top foam roller exercises to try at home. Try all of them for a minute and a half for maximal neural learning!
Exercise 1: Hitchhiker
Start with your hand, and maybe a small 3-5# weight in that hand, on top of your opposite hip. Diagonally rotate that thumb over the same side shoulder, anchoring the move in your shoulder blade for 1:30


Exercise two: One Toe Tap
Bring the knees to 90 degrees in the air and hold using your core and hip flexors. Now touch one toe down exhaling as you go. Do not feel in your back- if so, don’t go down as far or just practice balancing with legs in the air.


Exercise 3: Shoulder Blade Retractions
This looks like nothing is happening because all the movement takes place in the blades themselves. Arms straight up in the air, puuuuul your shoulder blades apart, and then pull your shoulder blades back together forcefully towards the roller equally. Do not tighten up the neck; focus on the lower aspect of the blades.


Exercise 4: Hot Cross Buns
Tuck elbows into ribs and have hands rest on opposite bicep. Open up hands and STOP at ninety degrees to try and work a tiny little rotator cuff muscle called the infraspinatus on the lower part of the shoulder blade itself. This is very subtle and keep all work out of neck.


Exercise 5: Straight leg drop
Now lift both legs straight up in air, and drop one straight leg down again feeling core and hip flexors work for 1:30. If you feel your back, try modifying how far you drop your leg and really exhale hard as the leg starts to drop.


Exercise 6: Helicopters
Start with weights at sides of ribs, pretending the weight in the hand is the rotor of a helicopter. Try to create rotation in the shoulder blade as pivot on your elbow. Circle clockwise and counterclockwise for 1:30. Keep work going in lower part of shoulder blade and not in neck.


Exercise 7: Open the Newspaper
Again tucking elbows into the ribs, open imaginary newspaper across chest feeling lower part of shoulder blades slide in towards spine and roller for 1:30. The roller should be a fantastic way to give you some kinesthetic feedback on what your shoulder blades are up to. If you feel the movement happen at the bottom of the blade, great. If not, this is your mission should you choose to accept it. 🙂


Exercise 8: Air Bike
Starting with knees bent at ninety degrees in the air, and start bicycling your feet for great work in the abs and hip flexors. If it creeps into your back, put your feet on the ground and break the 1:30 into 2 sets of 45 seconds.


I hope these exercises help your shoulder blades move more freely and with strength. If nothing else, just lying on the roll gives shoulders a welcome break from the forward hunching of driving and computers. Let me know how you liked the workout in the comments below!
Body postion reflections
The other day, I was sitting in a meeting with my co-workers at ClubSport Oregon and was struck by the general body position most people chose to be in. I secretly snapped photos of the crew and this is what I saw:

The energy in the room, as you might have guessed, was pretty low.
Look familiar?

Power of the pose
I had just watched a fascinating Ted Talk on what was dubbed the “power pose” by social psychologist and professor Amy Cuddy. This video has been viewed over 35 million times, so maybe this is old news to you. The question Amy Cuddy was trying to answer was: does your body language impact how you see yourself, and how others perceive you?
The basic findings in a nutshell: if you sit all hunched over, making yourself smaller, holding your neck, closing down, and wrapping your arms or ankles together you have an impact on your body on a cellular level. This position causes higher cortisol (stress hormone) and lower testosterone, which is associated with decision making ability and risk taking.
Opening up and making yourself big are expressions of power. Think of Usain Bolt at the Olympics on the track at the finish line. That guy makes himself big!
It is the impact on your physiology- the hormone levels that are impacted- that is so interesting to me. Remember, cortisol packs on belly fat, so anything you can do to decrease cortisol levels will help any muffin top you are looking to get rid of!
What’s the good news? Easy and simple to fix.
This is really the best news ever: turns out, you CAN fake it until you make it. Not feeling powerful? Totally fixable. Not only that- You can BECOME it!
Fake it until you become it!
In other words, if you aren’t feeling powerful, you can change your body position and your brain and hormones will follow suit. Make yourself small, your hormones will follow. Make yourself big and you get the following reaction: High testosterone and low cortisol which make you appear AND feel more powerful, assertive, and dominant
(testosterone qualities) but not stress reactive (cortisol qualities).
Our minds change our bodies, but our bodies can also change our minds.
This is really helpful for example in evaluating job candidates. Amy talks about the experiment she executed in her talk where she has people evaluate other people on wether they would want to hire them based on pure body language. The evaluators are shown clips of people who have spent two minutes making themselves small, or making themselves big for the requisite two minutes.
The people who made themselves big were chosen every time.
All it takes is two minutes!
I wanted to use this information and experiment on some unsuspecting victims right away. 🙂
Back to my meeting….
The energy in the room was now downright sluggish. I thought we should end on a hopeful, happy, and powerful note. After all, we have lives to positively influence! I threw my hand in the air and gave a quick summary of what I just wrote, and demanded we all bust out a power pose for two minutes.
Below shows what my awesome co-workers willingly subjected themselves to doing, except Nate.
Nate, Nate, Nate. There always has to be a dissenter in the room. 🙂 Even he manages a mild version of a power pose with his hands in his pockets.

Here we are doing POWER POSES!

Can’t you feel the energy in the room shift, just based on the photos? This is powerful stuff! Let me know how your experiments on yourself and your co-workers go in the comments below.
P.S. If you want to watch Amy Cuddy’s TED talk in its entirety, here is the link:
https://www.ted.com/talks/amy_cuddy_your_body_language_shapes_who_you_are?language=en
The lazy way to Flexibility
Do you have tight muscles?
Own a roller, but dislike rolling?
Dislike scrubbing (cross-fiber rolling) even more?
Does the thought send shivers down your spine?
Try this
Get your roller positioned on a tight spot. If you want to look around, prop yourself up on your elbows like my client Todd is below. He is targeting the inner thigh or adductors.

Stay there.
Don’t move.
No wiggling.
That’s it.
Aah, the beauty of simplicity.
Compress!
My client Kristin is doing a better job of completely relaxing while compressing her quad. She lies all the way down and is on a tight spot, but is not aggressively trying to beat it to a pulp with rolling or scrubbing.
Here she is relaxing and going after one quad at a time.

In this instance, she chooses to go after both quads.

If you are at home, you can turn on the TV and wait it out. The key: wait for the muscle to completely moosh out. I use this technique while FaceTiming or Skyping with clients. It usually takes around 20 minutes, but all of a sudden your muscle turns to moosh and dissolves.
It is remarkable.
Try doing it with a buddy!
Here are the children trying the compression technique for themselves. Annika goes for total relaxation and listens to music, while Sarah keeps an eye on things.
Both work great.

How does this work for other people?
Well, here is one recent example:
I was walking out of a meeting with friends, one of whom is training for Portland Marathon. He said that he needed help as his hamstring was crazy tight.
I offered to grab my roller out of the car, but he shook his head “no”. I smiled and was forced to demonstrate the magic of compression with my pink Hydro Flask water bottle on the walkway.
Apparently he is very literal and copied exactly what I did in the demo- (including using a water bottle even though they own rollers!)
His wife texted me this message later that night:

Give it a try and leave a comment on how you liked ( or dislike 🙂 compression!
Stay cool!
Loosen up your neck and shoulders
Here I am in one of my favorite places in the world- on a soccer field. I brought my favorite #triggerpointroller, and I have had a TON of clients lately with anywhere from rotator cuff problems to recovering from breast cancer surgery to tight necks….all of them have been coming in with super tight, locked up sort of shoulder areas. This has been the magic trifecta of ways to scrub and get these three spots to let go.
Get at the pecs!
Number one spot, and they are all sort of awkward and weird so hang in there with me, but number one spot is your pec muscle. Remember your pec muscle attaches here on your chest and comes over and attaches on the inside of the top of the arm. You’re going to shoot for this spot right here, and you’re going to take your #roller, and you’re going to try and scrub that very spot right in there. Remember that the muscle fibers run across the chest this way, so if you go perpendicularly to them, that will scrub them and get them to let go. You’ll go after the #fascia that way. Okay, so that is number one spot.
Go for the bicep groove!
Number two spot is actually the top of the #bicep tendon. The bicep, as you know, comes up the front of the arm here. You’re going to go after the #bicep muscle itself, and also where it attaches. Sort of in the groove where the tendon attaches. Here on down. You’re going to take that little turkey, and you’re going to go for that bicep and the top of the bicep groove. Again, you’re going to have to get up and over the top of your#roller to dig into that.
Then on to the shoulder blade
Third and final spot. You’ve got your shoulder blade. It sits here; the outside edge. That outside edge every time I time I poke that on everybody to try and get it to move they go, “Eeeeee!” “Eeeeeeh!” 🙂
So, I want you to take that shoulder blade spot and you’re going to put it on the outside edge of your #roller and again you’re going to scrub across it. You’ll find tight spots right away. All you have to do is lean back a little bit more so you can find that tight spot. Once you find a tight spot, just dig in there and scrubbitty scrubbitty scrub.
90 seconds
“How long?” you ask. Well, my favorite minute and a half is always the magic amount of time. Here on the ground is a little bit tricky; you might want to actually try an elevated platform like a couch or an ottoman or even the side of the bed.
Try scrubbing those three spots: Pec, bicep, and the outside edge of that shoulder blade. So thats your quick fitness tip for today to break loose that whole shoulder and help it feel about a thousand times better.
Okay! Here’s to balance, strength, and happiness! This is Laura Coleman with justmuscles.net and we’ll see you next time.
A couple of weeks ago, I found this email in my inbox from a guy by the name of Tim Ferriss. I took a screen shot of the part that caught my eye. It said:

A symptom of
I love the concept of the “problem is not really the problem” i.e. Tight hammies are just a symptom of tight lower legs. I have blogged about this concept before- remember this photo? Look at that blue highlighted fascia line. The hamstrings are very much connected to the lower legs. In a previous blog, it was suggested that we roll our foot on a golf ball for 30 seconds to help the fascia and loosen hamstrings.

New gizmo
Golf balls seem a bit mean, so like a good blog reader I clicked through the RAD Roller link to see what this magical tool could be. What I found was this, pictured on the right:

Two black rubber balls joined in the middle, looking remarkably like the two tennis balls joined by tape on the left. The RAD roller description said:
- THE EVERYWHERE MASSAGE TOOL: Made for the back, but use it for massage and myofascial release in your hips, on your feet, anywhere!
- DESIGNED IN A CLINIC. MADE FOR THE BODY. Tennis balls and lacrosse balls are made for sports, not your body.
- The RAD Roller is designed to replicate the firm but soft hands of a therapist SMALL AND PORTABLE. Take it with you in your gymbag or suitcase!
- MULTIPLE DENSITIES. Choose what works best for you….SOFT is better for the neck and shoulders. Stiff is great for athletes or the legs and calves.
- TRUSTED BY THERAPISTS AND OLYMPIC ATHLETES. RAD Rollers work for everyone! All bodies need relief; the RAD Roller is one of the most simple and versatile tools on the market.
In the name of Research
I decided that I needed to order one to see if it was really all that. To me, it looked like two lacrosse balls joined in the middle, but maybe there was some magic I was missing. It is $25.00, about 5x more than two lacrosse balls bought separately and taped together. I italicized and bolded the part that raised my eyebrows:
“tennis balls and lacrosse balls are made for sports, not the body.”
Really? I’ve been using and recommending both for years!
RAD is not the only kid on the block, by the way. Here is a screen shot of some competitors, all of which cost less:

Now for the real research
However, I digress.
The important part is how to get tight hamstrings looser by creating more lower leg mobility. I decided to experiment on several clients to see how they liked the loosening of hamstrings via foot and lower leg mobility.
Here is what we did:
3 or 4 Inchworms to establish how tight the hammies felt.

Then we rolled one foot 30x on the RAD roller, and the other on tennis balls in a sock:

Then we did 30x calf raises:

Then we did an achilles/calf stretch 10x each side using that same inchworm position:

And finally a few more inchworms to test out wether the hammies were looser.

The results: mixed!
Almost everyone loved rolling their feet and how much better their feet felt afterwards. About half the time, hamstrings were considerably looser, and the other half didn’t find anything noticeably different. For those that used the tennis balls in a sock compared to the RAD roller complained that the tennis balls wiggled all around in the sock, so I suggested taping the balls as in the photo above before placing in the sock.
Easy enough.
No one thought the RAD was considerably better than the tennis balls, including me. Rejoice!
Use tennis balls or lax balls or even golf balls to your heart’s content.
Try this out for your hammies because your feet will love it, and you might fall into the hamstrings love it too category. It’s a great experiment! Let me know how this worked for you in the comments below, which means you need to take 5 minutes out of your day and go try it!
How do you hinge at your hips?
Want to stop hurting your back and knees when you bend over or lift? Watch this simple exercise
Follow me


Copyright 2022
JustMuscles.net